Guides
How to Push Press like Chinese Weightlifters: Techniques, Strategies, Solutions
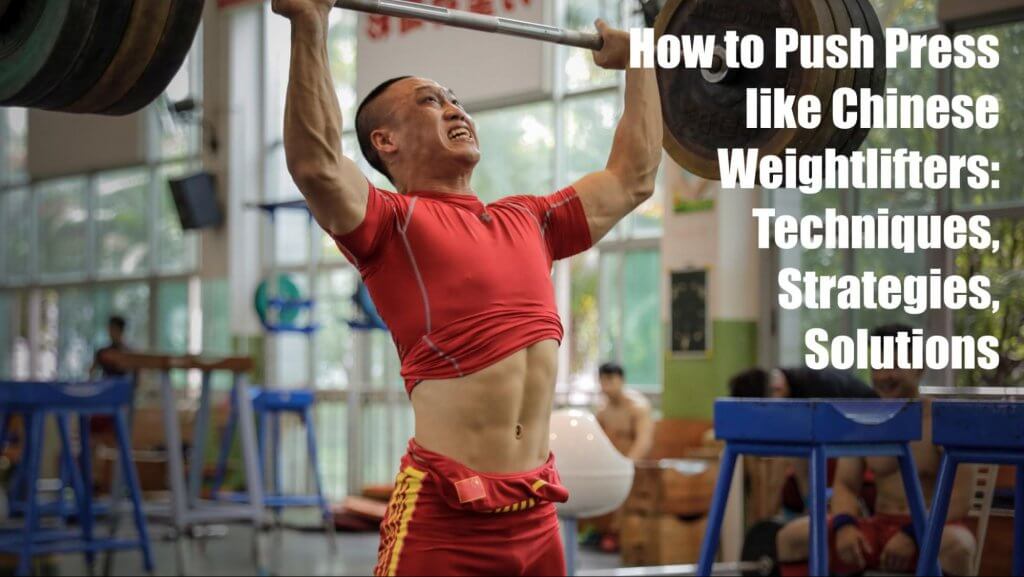
In this ultimate guide, I’ll show you EXACTLY how to push press using Chinese weightlifting technique.
While professional Olympic weightlifters in China use this technique, but it works for ANY body type!
And that’s not all!
Not only will you look at the barbell push press in a new way, but you’ll also learn the answers to some of the most popular push press questions.
So, if you want to push press the most weight for your Olympic weightlifting and/or CrossFit training, then you’ll love this push press tutorial!
Here’s a summary of what’s covered:
- Push Press Exercise
- Why is the Push Press So Hard?
- Push Press Form
- Can Your Feet Leave the Ground on a Push Press?
- Is Sliding Back During the Push Press OK?
- Why is Push Pressing Hurting My Lower Back?
- Benefits of the Push Press
- What is a Good Weight to Push Press?
- What “Should” My Push Press Be?
- How Often Should I Push Press?
- Does the Push Press Build Muscle?
- Is Push Press Better Than Strict Press?
- How Can I Improve My Push Press?
- How do I Make My Push Press Stronger?
- Conclusion
- Sources
So, if you’re ready to go “all in” with the barbell push press, this guide is for you.
Let’s dive right in.
Push Press Exercise
A favorite auxiliary exercise among Chinese weightlifters, the push press exercise uses a smooth dip, powerful extension, and active dorsiflexion to secure the weight overhead:
Why is Push Press So Hard? Enter the ISA
The barbell push press seems easy, but many athletes have trouble because it requires anterior and posterior expansion of your ribcage and full shoulder flexion under a heavy load.
Just like some people are built for squatting or deadlifting, some people are built for pressing overhead due to the shape of their ribcage.
How can you tell?
Check out the infrasternal angle (ISA), which is the angle formed by the infrasternal ribs, as shown by Zac Cupples:

According to Bill Hartman, if your ISA forms an angle near 120 degrees, then your ISA is “wide,” and if your ISA forms an angle around 60 degrees, then your ISA is “narrow.”
And if you’re stuck in between, then it’s just a matter of how biased you are to these 2 extremes.
Now, what’s cool is that the ISA is a representation of how/where you drive air, which biases you toward certain skeletal positions and joint actions.
For example, the ribcage on the right is compressed laterally compared to the ribcage on the left.
This “compression” is a reduction of space and limits your ability to “expand” (increase the space) laterally as you breathe.
So, your breathing strategy will direct air more anteriorly-posteriorly because it’s the path of least resistance.
And to accommodate this breathing strategy, the spine will flatten, the thoracic area will expand, and the scapulae will internally rotate (protract).
This orientation is more conducive to flexion, abduction, and external rotation, all of which are necessary to raise your arm overhead and behind you.
Now, this doesn’t mean a person with a wide ribcage will have a weak barbell push press.
But the wider your ribcage, the harder it might be to access an overhead push press position for weightlifting.
This is because the wider ribcage is compressed anteriorly and posteriorly, which directs air more laterally since it’s the path of least resistance.
But to accommodate this breathing strategy, the spine will extend, the thoracic area will compress, and the scapulae will externally rotate (retract).
And this orientation reduces the space you can access overhead but is more conducive to extension, adduction, and internal rotation, all of which are necessary for supporting weight.
Fortunately, the push press form used in China will maximize your push press and its transferability to other weightlifting movements.
Push Press Form
Push press form should be fluid, but here’s a breakdown of the key parts:
- Push Press Form: Stance
- Push Press Form: Start Position
- Push Press Form: Front Rack Position
- Push Press Form: Jerk Dip
- Push Press Form: Extension
- Push Press Form: Catch Position Overhead
- Push Press Form: Lowering the Bar Between Push Press Reps
And if you want a detailed breakdown of the snatch, clean, and other movements, check out this Chinese weightlifting book.
Push Press Form: Stance
In China, weightlifters use their natural jumping stance for the barbell push press because it produces the most vertical force.
And Chinese weightlifters usually perform the push press exercise after a power clean or from a squat rack or jerk blocks.
Regardless of how you start, your push press form should have the same stance.
However, weightlifters with a narrow ISA tend to use a relatively narrow push press stance, while wide ISA weightlifters use a relatively wide stance.
Why is there a difference?
Because different skeletal structures change the lines where one can apply the most force.
Let’s look at an example. Suppose we have 2 different athletes:
The dark triangle highlights the ISA and the larger triangle is a projection of the ISA, showing a helical line where you can apply the most force.
The athlete on the left has a narrower ISA, and his ribs are oriented more vertically, so he’ll produce more force using a relatively narrow push press stance.
The athlete on the right side has a wider ISA with ribs oriented more horizontally, so he’ll produce more force with a relatively wide push press stance.
But if you force the narrow ISA athlete to use a wide stance (or vice versa), their force production may be limited.
So, make sure your push press form uses your natural jumping stance.
Push Press Form: Starting Position
Now that you’re using a push press stance that maximizes vertical force, the next step is to use a starting position that transfers as much of that vertical force as possible. To achieve this push press starting position, you want to:
- Stand with straight legs.
- Stack your torso.
Let’s look at each component.
Push Press Starting Position: Straight Legs
The goal of standing up straight is to bring the combined center of gravity of the barbell and body as close to the ankle bone as possible. The dashed line shows this center of gravity:
Straightening your legs seems self-explanatory, but beginners sometimes feel anxious about push pressing, so they bend their knees to create some barbell oscillation.
Other weightlifters are very stiff and have difficulty yielding to descend during the dip.
For these lifters, bending their knees means they won’t need to dip very much and can focus on driving the bar upward.
Whatever the reason, this strategy does more harm than good.
First, it wastes energy because your muscles must work harder to resist moving the load than when the knee and hip joints are locked.
You could instead use this energy to drive the bar upward during the extension.
Second, bending your knees during the start position reduces the distance you travel before reaching optimal jerk dip depth.
As you’ll see later, this strategy reduces the amount of energy you can store and release for the extension.
And if you start with bent knees but don’t limit your dip, then it’s easy to shift your balance forward and away from the ankle joint.
At this balance point, the bar will have more pull on your body, and it’ll be easy to send it forward rather than behind you.
Push Press Starting Position: Stacking
The next part is to stack your torso.
What are you stacking?
Your thoracic diaphragm and the pelvic diaphragm, as shown in the green bowls on the image below:
The stack has several interrelated benefits for the barbell push press.
First, it allows you to expand air through the entire ribcage.
You need this capability because getting yourself into a front rack position requires ribcage expansion anteriorly and posteriorly.
The anterior expansion helps move your sternum forward, which prevents you from dropping the bar.
The posterior expansion creates a space for you to flex your shoulder and access the front rack position.
Second, the stack allows you to create intrathoracic and intraabdominal pressure.
If you can’t create these pressures, you’ll experience push press compensations like rounding your midback, dropping your elbows, and many others covered in this Chinese weightlifting book.
Third, when both diaphragms are stacked, they should descend and ascend together, allowing the viscera to move vertically.
This vertical movement is important because it creates an internal force that can assist or dampen your change of direction, just like the external force from the barbell’s oscillation.
The takeaway is: maintaining a stack will spare you a LOT of problems during the push press.
Now that you know the importance of stacking, how do you know if you’re achieving a stack?
When you have a barbell in the front rack position, you need some posterior tilt in the pelvis to maintain the stack.
Other than looking at yourself in the mirror, you should feel some lower glute and upper hamstring in your standing position.
But if you have trouble feeling that, then look here on how to coach the stack.
Push Press Form: Front Rack Position
The front rack position describes how you hold the bar in preparation for the push press. In China, the standard points for the front rack position are:
- Head up about 45 degrees.
- Elbows slightly in front of the bar.
- Bar racked across the groove of the deltoids and clavicle.
- Full but relaxed grip
- Grip slightly wider than power clean.
Let’s go into each of these aspects.
Push Press Head Position
In China, athletes learn to lift their head about 45 degrees, like this:
Why look up instead of straight ahead?
Normally, your spine has upper cervical extension and lower cervical flexion but lifting your head orients your lower cervical spine into extension.
This small change can have a big influence.
For example, this neck position helps create an arch through the rest of the spine, which concentrically orients your back muscles and compresses you posteriorly.
This result drives air anteriorly, which helps keep your chest up and prevents the bar from pulling you forward.
And that’s not all!
This neck orientation restricts its movement during the dip and extension.
Not only does restricting neck movement help preserve your balance, but it also maintains your chin out of the bar’s path so you don’t knock yourself during the extension.
Push Press Elbow Position
Your elbow position for the barbell push press depends on your degree of shoulder flexion and the relative length of your forearm.
You want enough shoulder flexion to position your elbows in front of the bar while maintaining your rack position, like this:
Usually, the longer your forearm, the less shoulder flexion you need, and hence the lower your elbow angle during the rack.
Whatever the exact angle, your elbows must be at least slightly in front of the bar.
This orientation has several advantages.
First, this orientation is stronger and faster compared to a higher elbow orientation.
Think about it. If you flex your shoulder so high that your humerus is parallel with the floor, then your arms are positioned like a triceps extension, like this:
This orientation is popular in the West.
While you can still get the bar behind you overhead with this strategy, your humerus must internally rotate over a longer path, increasing the time it takes to lock out the bar.
In China, most weightlifters lower their elbows to orient the arms more like an overhead press where the elbows point relatively further away from midline.
Not only is a press much stronger than a triceps extension, but it also reduces the amount of humeral internal rotation needed to lock the bar overhead.
Second, orienting your elbows slightly ahead of the bar points your forearm and humerus diagonally.
This angle is important because you want to catch the bar over the base of your neck.
If your elbow orientation is aligned with or behind the bar, then it’s easy to lose your rack position, like this:
In this position, it’s much harder to get the bar behind you.
Third, a lower elbow position helps balance your intrathoracic pressure.
If you flex your shoulder between 60 – 120 degrees, your scapula upwardly rotates and becomes more compressed on the thorax.
This scapular compression limits space for you to drive air posteriorly, making it harder for your to externally rotate your shoulder to grip the bar.
However, many Chinese weightlifters use 60 degrees of shoulder flexion or slightly less because the relatively downward scapular position allows for posterior expansion.
Push Press Rack Position
The front rack is the base to support the bar in preparation for the push press. The key is to rest the bar across your clavicle and the groove of your deltoids, like this:
This placement takes the pressure off your windpipe, allowing you to breathe easier.
You’re also able to drive air anteriorly because it’s easier to relax your neck, arms, shoulders, and chest.
Some Chinese weightlifters will push against the bar lightly to prevent it from rolling and help absorb the bar’s downward momentum during the jerk.
However, you don’t want to tense your forearms and shoulders to an extent where you lift the bar off the clavicle.
Doing so will place the bar higher on your neck, increasing pressure on neck arteries, veins, and your windpipe, which can cause you to pass out.
Push Press Grip – Hand Position
Once the bar is resting on the front rack, most Chinese athletes use a full but relaxed grip on the bar for the push press (see the photo from the previous section).
Like the discussion above, keeping a relaxed grip helps prevent tension in your arms, shoulders, and chest.
This tension can also create anterior compression, which inhibits your ability to drive anteriorly and support the bar on your rack.
Another reason for a full grip is it places the bar closer to the base of your palm.
Why does this matter?
Because you can push harder from the base of your palm and reduce wrist stress overhead.
Also, placing the bar near this spot minimizes the time it takes to get there.
Sure, you can balance the bar on your fingertips and try to roll the bar as you press overhead, but you might catch the bar with bent arms or miss the catch entirely.
Therefore, the Chinese weightlifters who use this strategy usually have short arms.
Push Press Grip – Width
Like the stance, the push press grip should follow your helical angle like this:
The closer you are to this helical angle, the more force you can produce.
Therefore, weightlifters with a wider ISA (left) should have a wider grip than weightlifters with narrow ISA (right).
However, in both cases, the push press grip is usually wider and lower than the clean or front squat grip.
The reason?
The clean and front squat have a greater range of motion, so you need more torso compression to prevent the bar from rolling off your rack.
In this situation, a narrower grip compresses your pecs against the ribcage while higher elbows increase scapular upward rotation, which compresses your ribcage posteriorly.
But during the push press, the range of motion is shorter, and you should not compress as much because you need the bar to move quickly!
This is why you’ll see elite weightlifters release the hook grip, adjust their grip wider, and reduce their shoulder flexion as they stand from a clean and/or front squat, like this:
Push Press Form: Jerk Dip
The jerk dip is the most technical part of push press form, and it can make or break a heavy lift. Chinese weightlifting coaches focus on these three aspects:
- Jerk dip depth
- Head, elbow, & knee position
- Rhythm
Let’s dive into each aspect.
Jerk Dip Depth
The optimal jerk dip is where your patella is aligned directly over the toes, as represented in the dashed line of the image below:
If the jerk dip is too shallow (i.e., knees behind the line), you usually won’t have enough downward momentum to stiffen your connective tissues to push against the bar.
And if your jerk dip is too deep (i.e., knees past the line), then it becomes easy to lose your balance forward, which will waste time and energy trying to stop the downward momentum.
If you have a habit of dipping too shallow or deep, then try this tip from the Chinese weightlifting book:
- Have a training partner align a PVC over your second and third toes (just like the dashed line in the photo above).
- Then, once you touch the stick, immediately extend.
This drill will help you know how deep to dip, and you can perform reps with and without the PVC to test your muscle memory.
But you can’t just reach the dashed line and call it a day.
You need the bar to move vertically to keep your balance and maximize your force production as you dip.
And the way to do that is to flex your knees and hips together, as shown by the arrows.
But rather than worry about whether your hips and knees are flexing sufficiently, call your friend to place a PVC vertically against the bar, like this dashed line:
In this drill, the PVC is against the outer edge of your foot. Then, as you dip, keep the bar in contact with the PVC without pushing against it.
Your body will bend in the way it needs to.
Jerk Dip Head, Elbow, & Knee Position
During the jerk dip, you want to position yourself to store energy and create a stretch reflex throughout your body. So, you want to keep your head up about 45 degrees and point your elbows and knees slightly outward, like this:
All the benefits of keeping your head up from the rack position still apply.
But the bonus during the dip is your pec muscles are slightly eccentrically oriented, so they’ll store some of the barbell’s energy and release during the press.
And this effect on the pecs gets stronger if your elbows point outward.
As for your knees, pointing them outward (but aligned with your feet) supinates your feet slightly so you can descend while maintaining your balance.
Additionally, your adductor longus and brevis eccentrically orient, which means they’ll be able to store energy like the pecs.
In fact, you can think of your adductor longus and brevis as an iteration of your pecs:
Jerk Dip Rhythm
The speed of the jerk dip influences how the barbell and body move together. In China, the emphasis is a smooth but fast jerk dip.
But what do “smooth” and “fast” mean?
First, consider a heavily loaded bar as in this video:
View this post on Instagram
Due to the yield and tensile strength of modern barbells, they oscillate as you stand, and this oscillation increases with momentum.
“Smooth” means you want to descend as the bar oscillates downward and reach your depth the moment the bar reaches its maximum downward oscillation, like this:
From a connective tissue standpoint, you want to yield so you can descend quickly (blue part) and generate downward momentum.
But you want to begin dampening this momentum (purple part) so you’ll be ready to extend once you reach your maximum depth.
This smoothness helps you maintain the connection with the bar and load your connective tissues to store energy.
It’s possible to descend faster than the bar, but you’ll lose your connection with the bar, and it’ll crash into you when you reach your jerk dip depth or when you extend.
Now let’s talk about “fast.”
Once you reach your jerk dip depth, you need to create a large impulse by exerting force as fast as possible (see the thin red line in the image above).
This sharp and forceful change in direction generates more downward elastic bend.
But as you turn the bar around, it’ll have even more upward oscillation, which means more speed and height.
Push Press Form: Extension/Push Press Leg Drive
With a smooth jerk dip and strong turnaround, you should be able to drive the bar at least 2/3 of the distance for extending your arms overhead, like this:
It’s possible to complete a barbell push press at lower heights, but there’s almost no way you can catch a split jerk or power jerk.
Therefore, if you want your push press to transfer over to your weightlifting movements, save the “pressing” portion of the push press to the lockout.
Push Press Form: Catch Position Overhead
If you want to push press heavy weights, you need a stable catch position overhead. In China, the standard points for locking out the push press are:
- Internally rotated arms overhead.
- Wrists extended and pronated.
- Head slightly forward and down.
These movements will align the bar over the base of your neck, like the left image on the left:
Why do you want this alignment?
Because it keeps the bar closer to your center of gravity which makes the bar easier to hold.
Additionally, it helps you maintain your stack.
If you align the bar behind you (as in the image on the right side), it’ll be easy to fall backward or lose tension from your stack.
Now that you know where the bar should be overhead let’s go over the details.
Internally Rotated Arms Overhead
When you catch the bar overhead, you need to create enough space to press against the bar.
In China, coaches emphasize internally rotating the arms as the scapula externally rotates (retracts), like this:
This statement can be confusing so let’s unpack it a bit.
When your scapula retracts, it points your glenoid (shoulder socket) away from you. So, you can think of scapular retraction as external rotation at the glenoid.
If you keep your arm fixed, the scapular external rotation shortens the proximal fibers of your subscapularis (the ones closer to the scapula).
This scapular movement produces relative internal rotation of the humerus.
Alternatively, you can internally rotate your humerus without moving the scapula.
In this case, you’ll shorten the distal fibers of the subscapularis (the ones near your arm).
If you have trouble visualizing these motions, watch how this video produces the same relative movement of the humerus:
And if you do both movements, then your subscapularis contracts from both sides to sustain this internal rotation of your arm.
But why bother with this internal rotation?
Because the scapular retraction compresses your back muscles to help you stabilize the bar (like a back squat).
And this position is much stronger than holding the bar further in front.
Wrists Extended & Pronated
In addition to internally rotating the arms, Chinese athletes extend their wrists and pronate to lock out the bar, like this:
The wrist extension provides maximum stability since the wrist is at its end range of motion.
And the pronation lets you exert maximum force by placing the bar near the base of your palm and aligning it with your elbow, shoulder, and stack.
Some athletes in the West learn to keep their wrists straight, but the wrist can flex or extend in this position.
Not only does this movement introduce instability, but it also reduces your ability to push against the bar.
So, if you’re trying to get rid of this habit, one analogy I like to use is to “feel like you’re pushing walls away from you.”
Head Slightly Forward and Down
Finally, most Chinese weightlifters look slightly forward and down about 45 degrees, like this:
The reason?
You might’ve heard this strategy uses more traps, but many people erroneously think the traps are elevating the bar.
Yes, this position uses more traps by compressing your upper back to keep you from falling forward, kinda like a back squat.
If you want to test this, stand upright against a wall, then move ONLY your head forward (don’t let any other part of your body lose contact with the wall).
You’ll notice your back muscles compressing to pull you back and avoid falling.
That said, your upper and middle traps draw the clavicle, acromion, and spine of the scapula backward and medially, but they don’t contribute any net torque on the scapula (Johnson et al. 1994).
Push Press Form: Lowering the Bar Between Push Press Reps
For overhead movements such as the push press, split jerk, power jerk, and squat jerk, Chinese weightlifters perform the following process to lower the bar to the front rack:
- Bend the knees slightly, near quarter squat height (this part is optional).
- Begin lowering the bar smoothly.
- Extend your legs and plantarflex your ankles.
- Relax your arms to lower the bar to your front rack while your lower body is extended.
- Absorb the load by bending your knees and dorsiflexing your ankles.
Here is each step in this process, starting from the overhead position (frame 0):
How does this lowering sequence work?
When the bar is overhead, its potential energy is high, and it can gain a lot of downward momentum as you lower it.
Bending your knees reduces the potential energy by decreasing the distance the barbell can fall from an overhead position.
Lowering the bar smoothly reduces its downward velocity, which further reduces the downward force.
And by extending your legs and plantarflexing, you further reduce the distance between your front rack and the bar.
Therefore, by the time you relax your arms, the bar will fall a shorter distance and your lower extremities can dampen the bar’s downward force like this:
So, you might think, “That’s great, but why bother?”
A few reasons:
First, this process is faster than stiffening your body and trying to control the bar’s descent with just your upper extremities.
Conserving time is especially important when performing CrossFit WODs.
Second, lowering the bar this way is less work because you shorten the distance to apply force.
This efficiency reduces time under tension and reduces fatigue per rep which is important for maintaining push press form over multiple reps.
Third is safety.
Sometimes you might be in a situation where you can’t drop the barbell, so you need to feel comfortable and confident about catching a weight.
Can Your Feet Leave the Ground On a Push Press?
No. During the push press extension, you don’t have a split or squat movement to help reestablish your base quickly; so, your timing will be off if your feet leave the ground.
Instead, you want fast plantarflexion to accelerate the bar upward, followed by fast dorsiflexion to push into the ground.
Therefore, make sure your feet look like this:
In the West, some amateur athletes learn to stay flatfooted through the entire push press.
While this strategy maintains your ability to push against the floor, it’s much slower and reduces the height of the extension and transferability to weightlifting.
Is Sliding Back During the Push Press OK?
Ideally, you don’t want to slide back during the push press exercise because you’ll increase the horizontal distance the bar travels and, hence, the amount of work per rep.
Sliding back can occur due to poor jerk dip or a body orientation that’s pushed forward, but it can also happen with a heavy load, like this 145kg push press at 62kg by Li Fabin:
View this post on Instagram
Whatever the cause, sliding back is a compensatory strategy due to insufficient hip extension.
If your hips cannot extend fast enough or strongly enough, you need another way to exert force into the ground and achieve an upright position.
So, what can you do about sliding back during the push press?
First, make sure you follow the technical requirements described for the jerk dip.
Second, lower the load.
Third, incorporate weightlifting accessory movements like lateral steps or step-ups with an anterior load to maintain an upright position while training hip extension on the stance leg.
Why is Push Pressing Hurting My Lower Back?
The push press exercise can hurt over time if you perform many reps with an excessively anteriorly oriented pelvis during the jerk dip, extension, or pressing portion.
Anterior orientation of the pelvis looks like this:
In this case, your spine internally rotates (extends) to stay upright and closes the space for you to expand air posteriorly.
In response, your abs must eccentrically orient to create space, which moves the diaphragms farther apart.
It’s kinda like compressing one side of a balloon and seeing the other side expand to make room for the contents.
But this orientation loses the stack and creates a tendency for your viscera (and yourself) to move forward.
And to avoid falling forward with a loaded bar, you must arch your back and use even more posterior musculature to (hopefully) counter this tendency.
Over time, you lose hip extension because your pelvis is already pointing towards the ground to produce force:
This loss means you need to compensate somewhere else, like your lower back, which can result in pain over time.
What can you do about it?
Try some exercises to control your rib cage flare.
Benefits of the Push Press / What are Push Presses Good For?
Chinese weightlifting researchers found several benefits of the push press exercise:
- Improves snatch performance.
- Improves clean and jerk performance.
- Helpful in teaching the jerk to beginners.
Let’s look at the evidence for each of these claims.
Benefits of the Push Press: Snatch Performance
Yang et al. (2002) tested the benefit of the push press exercise on snatch performance by conducting a controlled experiment with 20 national-level female weightlifters.
Here’s how they conducted the push press experiment:
They divided these Chinese weightlifters into 2 groups (A and B) of 10.
And each group had 2 athletes per women’s weight class except 53kg and 69kg.
Group A performed experimental training that incorporated the barbell push press exercise as an assistance movement for the snatch and clean & jerk.
Group B followed the usual method of incorporating the push press exercise as an assistance movement for the clean & jerk only.
So, Group A doubled their push press training relative to Group B.
Then both groups followed this training during their winter training period, which is a strength training cycle lasting 12 – 14 weeks.
The results?
Group A’s push press improved faster than Group B.
This result makes sense because Group A had more frequent push press training, so they got more technically proficient and stronger.
But the really interesting part?
The snatch performance of Group A improved faster than that of Group B!
The researchers believed this result occurred because of the similarity in the lifts. Despite the fact the push press extension requires more posterior expansion compared to the snatch:
Both movements finish the tension on the ball of the foot with the torso as straight as possible.
Both movements require active dorsiflexion to return the feet to the ground and push through the midfoot.
So, there’s a significant carryover between the snatch and push press, making it a good weightlifting accessory movement.
Benefits of the Push Press: Split Jerk Performance
Following up on Yang’s research, Li and Su (2010) conducted a similar controlled experiment with 14 weightlifters in Fujian Province to test whether push press training benefits split jerk performance.
They recruited 2 groups of 7 athletes (5 males and 2 females in each group) who have been training for 2.5 years on average and weighed 48 – 63kg.
Group A performed experimental training where they performed the push press exercise 6 times per week.
Group B followed the usual method of incorporating the push press exercise 1 – 2 times per week with medium intensity.
Then both groups followed this training for 1 month before testing their split jerk.
The results?
Li and Su’s experimental group still saw greater increases in the split jerk (3.57kg) than the control group (1.79kg) even though the experiment lasted only a month compared to the 3 months used in Yang et al.
Interestingly, they also controlled for improvements in the clean deadlift.
The reason?
Usually, if your clean deadlift increases, your clean should be less taxing which means you’ll have more energy to split jerk.
But since both groups increased their clean deadlifts to similar degrees, the only factor left is increased push press.
After the experiment, the researchers surveyed the weightlifting coaches and weightlifters to gather qualitative data.
Because the split jerk has a wider base of support relative to the push press, it is easier to jerk successfully even without perfect technique.
However, by performing the push press exercise (as outlined above), the weightlifting coaches noticed:
- More stable front rack position.
- Increased rhythm and coordination through jerk dip and extension.
- More vertical extension.
Because these qualities are identical between the push press and split jerk, it makes sense that improving these qualities through push press training will also benefit split jerk performance.
Benefits of the Push Press: Teaching
Additionally, many Chinese coaches who work with young athletes see the barbell push press as a valuable teaching progression for the jerk because it:
- Improves rhythm and position for the jerk dip (Xu 2010).
- Strengthens overhead position (Hu and Gao 2008).
- Improves the weightlifting extension, which transfers over to the jerk (as well as snatch and clean).
These benefits occur because the push press exercise is less complex than a split jerk or squat jerk.
This is why the push is taught before the split jerk or squat jerk in the Chinese weightlifting technique program.
What is a Good Weight to Push Press?
Now that you know Chinese technique, a good weight to push press depends on your weight class. This table shows Chinese weightlifting percentile rankings of the push press for men. For example, a 133kg push press is “average” if you’re a 77kg weightlifter.
And if you’re an 85kg with a 174kg push press, that puts you at the top among Chinese weightlifters.
These data (and other weightlifting standards) were gathered by Zhang (2011) and are part of the Chinese weightlifting calculator.
What Should My Push Press Be?
In general, Chinese research shows your push press should be roughly equal to your snatch.
Yang et al. (2002) confirmed this result by studying 54 nationally ranked females from the National Team, Army Team, and provincial teams from Liaoning, Guangdong, Hunan, Shandong, Shanghai, Sichuan.
The researchers ran a regression using snatch and push press data from these athletes and generated the following equation:
Ysnatch = -0.002128 + 1.022Xpush press
This equation means every 1kg increase in push press results in a 1.022kg increase in the snatch.
Even with rounding, this relationship means your push press should be within 1 – 2kg of your snatch.
Visually the relationship looks like this red line:
What about men?
In the Chinese Olympic weightlifting book, Guo (2014) presented weightlifting ratios stating a “good” weight to push press is 78% of your clean & jerk.
He also mentioned your snatch should be 80% of your clean & jerk.
So, a 2% difference between push press and snatch (relative to the clean & jerk) is equal to Yang et al.’s results.
These weightlifting ratios are a measurement of technical efficiency and can guide programming.
For example, let’s say your push press is much greater than your snatch.
In this case, your push press form is not consistent with your snatch technique and improving your barbell push press will transfer minimally to your snatch (Yu 2011).
However, you should also consider your body structure along with your technique.
For example, it might be the case that your extension for the push press and snatch is good, but your snatch is limited due to your hook grip capability.
How Often Should I Push Press?
Because research has shown the benefits of the push press exercise on the snatch and clean and jerk, most provincial-level Chinese weightlifters perform the push 2 – 3 times per week. But training frequency of any movement, including the push press, depends on:
- Your training goals.
- Your current training.
- Your key performance indicators.
- Your movement capabilities.
For example:
- Maybe your goal this training cycle is to increase leg strength, in which case you’ll have less energy to devote to push press exercises.
- Maybe you haven’t done a barbell push press in a while, in which case 3 times per week is a huge change.
- Maybe your push press is already strong, in which case you could devote more of your training to other capabilities.
- Maybe you have trouble getting overhead and need some shoulder mobility exercises, or you’re restricted and need exercises to create more space.
That said, Xu (2010) has the following recommendations for beginners and lower intermediate weightlifters if you’re using the push press to improve your jerk:
- Use loads that avoid compensatory strategies (i.e., hyperextension, long press out, etc.).
- Use sets of 4 – 6 reps to focus on power.
- Practice the push press exercise 3 times a week to build muscle memory.
- Perform the barbell push press first or early in your training day to avoid compensatory strategies from fatigue.
What Muscles Does the Push Press Work?
While push presses work your entire body, in practice, Chinese weightlifters often feel fatigued in upper body muscles such as the triceps, deltoids, trapezius, pectoralis, latissimus dorsi, serratus anterior, and rotator cuff.
The reason?
The push press loads the upper body relatively more than the legs (especially if you control the descent).
However, Chen (2015) notes that the quadriceps, glutes, hamstrings, adductors, plantar flexors, and dorsiflexors are very active during a push press. So, it’s normal if you feel soreness there too.
Does the Push Press Build Muscle?
Now that we know the muscles involved, it’s natural to wonder, “does the push press build muscle?” The answer is yes, provided you:
- lift a sufficient volume using heavy loads,
- lift light loads under fatiguing conditions, or
- accentuate the lowering with heavy loads.
Let’s see how each of these methods work.
Push Press for Mass: Heavy Weights
Chinese weightlifters primarily use the repetition method and intensity method for the push press to assist the split jerk; however, these training methods (and others in the Chinese Olympic weightlifting book) can have a side benefit of building muscle mass:
Beardsley (2019) summarizes why these methods can build muscle:
First, at 85% of 1RM (1 rep max) and above, the repetitions generate full recruitment of high-threshold motor units due to Henneman’s Size Principle.
And the muscle fibers innervated by these motor units are highly responsive to strength training stimuli and have greater anabolic signaling after training, which leads to more muscle growth.
Second, the repetitions produce a slow contraction velocity in the muscle.
Why is a slow contraction velocity important?
Muscle fibers produce force by forming cross-bridges between actin and myosin myofilaments.
The more cross-bridges formed and the longer they stay formed, then the more force the muscle fibers can produce.
These cross-bridges are detected as tension by mechanoreceptors on the muscle cell membrane, which signals a cascade to increase protein synthesis and protein content of the muscle fiber, which is hypertrophy.
Repetitions that meet these two criteria are called stimulating reps.
And while it’s unclear how many stimulating reps are necessary to generate muscle growth, the intensity and repetition methods preserve push press form while producing stimulating reps during the entire set.
Push Press for Mass: Light Weights
Chinese weightlifters primarily use the bodybuilding method for movements without a large technical component, such as rows, pullups, biceps curls, pushups, etc. This method is rarely used for push press because it relies on speed and timing.
However, this method is used frequently in CrossFit and can supplement heavy training to build muscle.
At first, it might seem counterintuitive that you can stimulate muscle growth by push pressing with light weights.
Once again, Beardsley (2019) comes through with a great explanation:
Basically, unlike the heavy methods, moderate (6 – 15RM) and light (15RM+) training do not involve full motor unit recruitment on all the reps in a set.
The reason?
Henneman’s Size Principle. If your body doesn’t need to recruit all the fibers, it’ll only use what’s necessary and conserve the rest.
Additionally, if you’re moving quickly during these light reps, there’s not enough time to muscle fibers to form and maintain actin-myosin cross-bridges, which stimulate muscle growth.
But as you fatigue, the situation changes.
Your body will gradually recruit higher threshold fibers to maintain the force production during the set.
And this recruitment will continue until full recruitment occurs and maintained until you stop the set or reach muscular failure.
At the same time, your bar speed decreases as you fatigue which means your muscles must contract longer to overcome the weight.
Now you have the necessary conditions for mass building: full recruitment of high-threshold muscle fibers and slow contraction velocity.
Therefore, only the final reps of sets with moderate and light loads will count as “stimulating reps,” while the earlier reps will not.
If that’s the case, then why waste your time with this method?
First, you have other connective tissues beyond muscles that are loaded and recover at different rates.
If you pound away heavy weights every day, your joints might hurt.
Additionally, light weights can preserve push press form and build mass for the motor pattern you want to use at heavier weights.
If your push press form is all over the place at heavy weights, then you’re loading muscles in different ways, and it’ll be harder to improve your lifts.
Push Press for Mass: Accentuated Lowering
Most Chinese weightlifters either 1) drop the bar after its overhead or 2) yield to lower the bar quickly (as discussed in the section Push Press Form).
These strategies help reduce muscle damage from lowering the bar and help preserve training frequency.
But sometimes you can’t drop a weight, or you have to control the weight down like a heavy strict press.
The benefit of controlling the weight is it can build mass if the weight is heavy enough.
Your muscles are about 30% stronger when eccentrically oriented than concentrically oriented (Kelly et al. 2015).
So, if your 1RM overhead press is 100kg, the weight is only 70% during the lowering of a push press.
But full motor unit recruitment occurs at 85 – 90% 1RM (Beardsley 2019).
So, you’ll need 111kg – 117kg to overload the lowering phase to introduce enough intensity to recruit high threshold muscle fibers.
And if you increase the duration of the lowering at this intensity, the time under tension and force production increases which stimulates greater increases in fiber diameter (Sharifnezhad et al. 2014) and strength (Walker et al. 2016).
Is Push Press Better Than Strict Press?
Whether a push press is better than a strict press depends on the context and the goal. Both movements can be effective for building strength and power for the jerk.
For example, consider the force-velocity curves:
The yellow curves are the initial condition and show faster contraction velocities produce less force, while slower contraction velocities produce more force.
The red vertical line shows the necessary speed to complete a clean & jerk. If you maintain that speed with heavier weights, then your potential clean & jerk will increase.
Now, the left panel shows a context where force production is low.
For example, children and many female weightlifters lack upper body force production to support a heavy bar in the rack position or overhead.
Or they might lack control to absorb the bar when they lower it between reps.
In this context, Chinese coaches use the strict press to increase force production to control and support the bar.
This training shifts the yellow curve up to the blue curve and improves the clean & jerk.
On the other hand, the center panel shows a context where the lifter already produces high force.
In this context, the yellow curve simply rotates clockwise, which means training the strict press can still increase force production, but it reduces your speed and stagnates your clean & jerk.
Charniga (2014) presents Soviet research of this phenomenon showing high muscle tone has a negative effect on the muscles’ ability to relax, and strong pressers use their arms too soon.
This movement pattern pushes the body down when it should be elevating, which adversely impacts the speed of the extension for the jerk.
In this context, Chinese coaches focus on increasing power and speed through the push press exercise and other methods to increase force production for the clean & jerk (as shown in the right panel).
How Can I Improve My Push Press?
If you want to improve your barbell push press, you must create enough space to access the overhead position and exert force. Several weight training strategies to improve your push press are 1) single arm pressing, 2) seated exercises, and 3) inversion activities.
Many weightlifting accessory exercises fit these criteria, and I cover them in Level II Chinese weightlifting seminars, but here are some examples:
Single Arm Push Press
You can perform a single-arm push press with a plate, dumbbell, or kettlebell. This movement creates expansion on the reaching side and compression on the downside, which can help you access the overhead position.
For weightlifters with a wide ISA, the benefit is on the downside because it compresses the ribs laterally, which can restore anterior-posterior expansion.
For weightlifters with a narrow ISA, the benefit is on the reaching up position because it expands the lateral rib cage.
Additionally, because your hand is not on a fixed barbell, you can focus on internally rotating your humerus and exert force overhead.
Seated Overhead Press
The seated position provides greater rib cage expansion vs. other body positions (Takashima et al. 2017). It also helps stack your ribs over your pelvis, which helps realize a good overhead press position for most weightlifters.
To realize this benefit, you should feel pressure over your ischial tuberosity (sit bones) and keep your ribs down throughout the movement:
Decline Pushup / Decline Triceps Extension
The benefit of inversion activities is they move air towards the top of your lungs. Biasing breathing there creates upper thorax expansion and can restore shoulder range of motion.
For example, prone inversion activities like decline pushups and other handstand progressions can be suitable for narrow ISA weightlifters.
Additionally, supine inversion activities like decline triceps extension are suitable for wide ISA weightlifters.
How Do I Make My Push Press Stronger?
Assuming you can get into proper technical positions, the key to a stronger push press is improving the jerk dip and extension because these elements are responsible for clearing 2/3 of the range of motion overhead.
Now, instead of picking random exercises, you can make a more informed decision by looking at the ISA.
Weightlifters with a narrow ISA tend to be better at descending during the barbell push press than stopping and ascending.
So, you’ll see things like dipping too low to dampen the downward force or caving the knees in to close the pelvic inlet and push your guts upward.
By contrast, weightlifters with a wide ISA tend to be very stiff, so they are better at stopping and ascending during the push press rather than descending.
So, you’ll see things like a very short, abrupt jerk dip or sitting back to create depth (instead of sitting down.
Given this info, here are some popular weightlifting accessory movements to strengthen your jerk dip and push press.
How to Increase Push Press: Jerk Dip (Normal)
The jerk dip is a versatile exercise used in Chinese weightlifting training to build confidence and rhythm for the dip. Simply dip smoothly and then stand up immediately.
If you do it correctly, the barbell oscillates down as you dip and oscillates up as you stand.
How to Increase Push Press: Jerk Dip (Paused Reps)
If you tend to dip too deep or have trouble stopping yourself (like a narrow ISA person), try adding a pause at the bottom of the jerk dip for 1 – 2 seconds before standing.
This movement helps you keep your pelvic diaphragm concentrically oriented during the dip to avoid losing control.
And you can even place a high box for you to sit on if you have trouble stopping yourself.
How to Increase Push Press: Jerk Dip (Static Yield)
If you are super stiff, tend to muscle your push press, sit back during the dip, or have trouble getting enough depth in the dip (like a wide ISA person), then try a jerk dip with a static yield:
By pausing at the bottom for at least 5 – 6 seconds, you induce a relaxation response in the connective tissues, allowing them to yield.
Once the connective tissues can yield, you can dip more vertically and with more speed.
How to Increase Push Press: Jerk Dip (Oscillatory)
During the oscillatory jerk dip, you start the movement with tension, release the tension, and re-tense.
It looks like a normal jerk dip but without a pause in between reps, like this:
The main benefit of oscillation is that it teaches you how to store and release energy to take advantage of the stretch reflex.
This movement is great for stiff athletes who can’t yield (wide ISA) because the bar loads the connective tissues to a greater degree with each rep.
The oscillation also helps athletes who have trouble extending (narrow ISA) because it trains them to tense and re-tense themselves.
However, you might want to use a shorter range of motion to avoid reinforcing too deep of a jerk dip.
How to Increase Push Press: Banded Barbell Push Press
The banded barbell push press is a fantastic movement if you have trouble producing upward force during the extension:
When you dip, your guts suspend for a second and then fall, creating a downward internal force.
If the guts crash into your pelvis as you extend, then your rhythm will be off, and it will be hard to produce upward force.
So, the bands accentuate the downward force of your guts, which can improve coordination during the extension.
The banded weights also delay the change in direction for the barbell, which gives you more time to store energy in your connective tissues.
And as the bands recoil, they assist with upward force on the bar.
So, this is a great push press exercise for narrow ISA weightlifters who can control themselves downward but are slow to turn around or extend quickly enough.
How to Increase Push Press: Overhead Pin Press
The pin press is a partial press movement. For weightlifting, it trains the lockout or push under portion of the barbell push press.
So, if you have a good jerk dip/extension but have trouble locking out, then this weightlifting accessory movement is for you.
To train the lockout, set the height in a squat cage near the last 1/3 of the range of motion.
Because the load can be high for partial range movements, it’s better to minimize the movement by performing it behind the neck so you can focus on pushing straight up, like this:
Honestly, the athlete in the photo could start 1 – 2 pins higher to maximize the transfer for his push press.
Regardless, make sure to stand up straight with your head looking down about 45 degrees and your elbows are pointing directly away from you.
This posture will align the bar over the base of your neck and midfoot.
Once you set up, push explosively!
And if you want more transfer to your push press, set the bar higher to include your plantarflexion, like this:
From this position, bring your heels down push yourself under the bar explosively.
Conclusion:
Congratulations for making it this far!
I hope you enjoyed this ultimate push press guide.
Now I’d like to hear from you.
Do you think the push press exercise has a place in a weightlifting program?
Are you going to modify your barbell push press form?
Or will you try any of the weightlifting accessory exercises to increase push press performance?
Let me know by leaving a quick comment below right now.
Sources:
Special thanks to IFASTU
Beardsley, Chris. 2019. Hypertrophy: Muscle Fiber Growth Caused by Mechanical Tension. KDP Publishing.
Charniga, Andrew. 2014. “More about the Jerk.” Sportivny Press.
Chen, Wei. 2015. “The Application of Push Press Training on the Snatch and Clean & Jerk.” Journal of Anhui Sports Science. 36(12): 52 – 54.
Guo, Qinghong. 2014. “The Relationship between Assistance Movements and Technical Movements.” Presented at the 2014 Ma Strength Summer Weightlifting Camp.
Hu, Guangping, Gao Lin. 2008. “Youth Weightlifting Athletes’ Training Content and Arrangement.” Shanxi Sports Science. 28(1 – 2): 56 – 58.
Johnson, Garth, Bogduk, Nikolai, Nowitzke, Adrian. And D. House. 1994. “Anatomy and Actions of the Trapezius Muscle.” Clinical biomechanics, 9(1). 44 – 50.
Kelly, Stephen, Lee Brown, Steven Hooker, Pamela Swan, Matthew Buman, Brent Alvar, and Laurie Black. 2015. “Comparison of Concentric and Eccentric Bench Press Repetitions to Failure.” The Journal of Strength & Conditioning Research. 29(4): 1027 – 1032.
Li, Shangfu & Su Minying. 2010. “The Effect of Push Press Training on the Jerk.” Journal of Ningde Teacher’s College (Natural Sciences). 22(1): 26 – 28.
Sharifnezhad, Ali, Robert Marzilger, and Adamantios Arampatzis. 2014. “Effects of Load Magnitude, Muscle Length, and Velocity During Eccentric Chronic Loading on the Longitudinal Growth of the Vastus Lateralis Muscle.” Journal of Experimental Biology. 217(15): 2726 – 2733.
Takashima Sachie, Masafumi Nozoe, Kyoshi Mase, Yusuke Kouyama, Kazuhiro Matsushita, & Hiroshi Ando. 2017. “Effects of Posture on Chest-Wall Configuration and Motion During Tidal Breathing in Normal Men.” Journal of Physical Therapy Science. 29(1): 29 – 34.
Walker, Simon, Anthony Blazevich, Gregory Haff, James Tufano, Robert Newton, & Keijo Häkkinen. 2016. “Greater Strength Gains After Training with Accentuated Eccentric than Traditional Isoinertial Loads in Already Strength-Trained Men.” Frontiers in physiology. 7. 149.
Yang Zhijun, Li Xueyi, Hu Xianhao, & Wang Xingze. 2002. “Investigation on the Relationship between Snatch and Push Press among Elite Female Weightlifters.” Chinese Sports Coach (4): 22 – 23.
Xu, Zhihu. 2010. “Training Content and Arrangement of Youth Weightlifters.” Journal of Huaibei Professional & Technical College. 20(4): 144.
Yu, Zhongyou. 2011. “On the Value and Application of the Push Press as an Assistance Exercise.” Journal of Chifeng University. 27(5): 156 – 158.
Zhang, Jie. 2011. “Research on Evaluation Index System of Specific Physical Fitness of China Men’s Weightlifting Athletes.” Master’s Thesis. Chengdu Institute of Physical Education.
Dear Manuel, thank you for this deep dive. I found the information on the ISA very interesting. I would like to ask whether you could give us a few examples of wide/narrow ISA in Chinese weightlifters to see how this plays out in practise. Looking at them, I would guess Shi could be considered “wide”?
You’re welcome Philipp. Generally, a wide ISA is built more like a stocky powerlifter while a narrow ISA is taller and narrower like a strongman. Measuring the ISA is the best way to know for sure. That said: Ai Yunan and Li Wenwen have a wide ISA. Lu Xiaojun appears narrow.
Hola Manuel, me ha parecido muy interesante este artículo, llevo más de media vida practicando halterofilia y esta lectura me hace pensar más allá de un movimiento mecánico a comprender y enseñar mejor a mis alumnos. Espero poder seguir leyendo este tipo de lectura.
Hola Antonio, gracias por su comentario. El cuerpo no es una simple máquina, por lo que necesitamos un mejor modelo de comprensión. Me alegro que usted disfrutó leer el artículo 🙂
Maravilhoso parabéns , sou fã e tenho na base de minha formação, informações adquiriras pela ogrebcteam
Obrigado amigo 🙏
Thank you so much for this. The push press has always been my favorite exercise and I have not been able to find an article that connects as many dots as this one does. I’ve played with numerous ideas for the past ten years in developing a barbell and strongman style push press and the explanation of ISA is something I have never heard of, but it makes so much sense. Thank you again and again.
Hey John, thanks for your review. Glad you liked the article!
Thanks for this great article. The rotating of arms at lockout and the bent wrists were nice to hear (I’ve gotten flack for that!).
Push pressing 5×5 really heavy is a great heart pounding workout. At first I loved strict presses but the extra weight overhead and the legdrive make pushpressing superior to me. I’m 92kg and I’ve only ever pushpressed 85kg. Hoping to push press my bodyweight for 5 as I am really focusing on it.